

Manufacturing faces frequent challenges in preform mould design, including flash, short shots, bubbles, black spots, crystallinity, uneven wall thickness, thread and neck defects, mold flaws, wear, surface defects, dimensional inaccuracies, and uneven cooling. These issues threaten product integrity and can disrupt high-quality production. Quality standards demand solutions that preserve product quality and integrity. The following table shows the frequency of common defects in PET preform molding:
| Defect Type | Frequency (%) |
|---|---|
| Bottle Leakage | High |
| Foil Tightness | High |
| Improper Labeling | High |
| Other Defects | Low |
Effective mold design and preform molding practices reduce manufacturing challenges and support high-quality production.
Key Takeaways
- Manufacturers face various challenges in preform mould design, including surface defects, dimensional inaccuracies, and cooling issues. Addressing these challenges is crucial for maintaining product quality.
- Implementing effective cooling systems and precise mold alignment can significantly reduce defects like flash and short shots. Regular maintenance of molds ensures consistent performance and quality.
- Maintaining uniform wall thickness is essential for the strength and reliability of PET preforms. Automated mapping systems help monitor thickness and prevent weak spots.
- Choosing the right ISBM machine based on material compatibility and production capacity is vital for efficient manufacturing. Proper machine specifications help avoid bottlenecks and ensure quality.
- Routine maintenance, including cleaning and lubrication, is key to extending mold life and reducing defects. Regular inspections help catch issues early, ensuring smooth production.
Surface Defects in PET Preform Molding
Causes of Surface Defects
Surface defects often appear during PET preform molding and can impact both appearance and performance. Many defects arise from issues in manufacturing, material selection, or mold design. Industry studies report several frequent causes:
- Foreign matter contaminates the resin and creates visible marks.
- Recycled resin sometimes introduces impurities that affect surface quality.
- Old resin stuck inside the extruder die head leads to streaks or discoloration.
- Excess moisture in the resin produces splay marks and bubbles.
- The parison thickness controller moves the die too fast, causing flow lines.
- The parison wall contacts the cold mold surface twice, resulting in uneven texture.
Surface defects include flow lines, sink marks, delamination, weld lines, jetting, discoloration, splay marks, flash, burn marks, and pitting. Discoloration affects the appearance of PET preforms but does not usually reduce material strength. Delamination creates thin peelable layers and can lower the strength and integrity of the preform.
Surface defects such as streaks, pitting, or discoloration may not always weaken the material, but they reduce the visual appeal and can signal deeper manufacturing problems.
Solutions for Surface Defects
Manufacturers use several strategies to reduce surface defects and improve preform molding quality. Process adjustments and mold modifications play a key role. The following table highlights proven solutions:
| Evidence Type | Description |
|---|---|
| Cooling System | Purposefully arranged cooling passages extract warmth rapidly, maintaining plastic stability. |
| Mold Alignment | Precise mold elements (±0.01mm) prevent uneven distribution of liquid plastic. |
| Mold Design | Unified mold structure reduces overflows and distortion, enhancing quality. |
Other effective solutions include:
- Adjust cooling channels to minimize shrinkage in thick sections and prevent sink marks.
- Ensure proper venting in the mold to eliminate voids during injection.
- Optimize plastic flow with smooth surfaces and proper gate design to prevent streaks.
Manufacturers who address these issues consistently achieve higher quality in pet preform molding. Careful mold design and process control help prevent surface defects and ensure reliable performance.
Dimensional Inaccuracies & Wall Thickness Issues
Causes of Dimensional Problems
Dimensional accuracy plays a vital role in pet preform molding. When manufacturers fail to control dimensions, problems can arise in downstream processes. Several factors contribute to these issues:
| Cause | Explanation |
|---|---|
| Misalignment of core pins | This can lead to inconsistent dimensions in the preform, affecting the overall shape and size. |
| Worn-out cavity pieces | Deterioration of cavity components can result in uneven wall thickness due to improper molding. |
| Poor melt flow | Inadequate melt flow during injection can cause variations in thickness and dimensional accuracy. |
A misaligned core pin often causes the preform to lose its intended shape. Worn cavity pieces may create thin or thick spots, which weaken the container. Poor melt flow can result in unpredictable wall thickness, making the preform less reliable.
Even a small deviation in wall thickness, such as 0.1 mm, can increase ovality defects by 34%. This leads to weak spots and potential leakage in finished containers.
Solutions for Accurate Preform Molding
Manufacturers use several engineering solutions to achieve consistent dimensional accuracy and wall thickness. These methods help maintain quality and prevent defects:
- Gate design controls material flow and minimizes defects.
- Cooling systems ensure uniform cooling, preventing warping and shrinkage.
- Core and cavity design influences part geometry and surface finish.
- Wall thickness uniformity is essential for structural integrity and visual appeal.
- Material handling and drying prevent moisture-related defects.
- Ejection systems ensure smooth demolding without damage.
Maintaining preform wall thickness below 0.05 mm is essential to avoid stretching issues during blow molding. Automated mapping systems now help ensure consistent thickness across preforms. Real-time geometric checks using profile projectors and regular dimensional checks of neck diameter, body thickness, and thread profiles help spot defects early.
| Tolerance Type | Specification | Impact on Downstream Processes |
|---|---|---|
| Dimensional Accuracy | ±0.005 mm | Reduces flash and improves sealing surface consistency. |
| Wall Thickness Control | Variations below 0.05 mm | Ensures uniform expansion during blow molding, enhancing integrity. |
| Quality Impact | Minor deviations | Can lead to weak spots, uneven stretching, or leakage in containers. |
By following these practices, manufacturers improve dimensional accuracy and reduce the risk of defects in pet preform molding.
Flash, Short Shots and Incomplete Fills
Common Causes
Flash, short shots, and incomplete fills often appear in PET preform molding. These defects can disrupt production and lower product quality. Flash forms when excess material escapes the mold cavity, while short shots and incomplete fills occur when the plastic does not fill the mold completely. The following table shows the most common causes and their solutions:
| Cause Type | Common Causes | Solutions |
|---|---|---|
| Material-Related Issues | Moisture in resin, contaminated resin | Check dryer temperature, dew point, and drying time; clean the hopper and use high-quality resin. |
| Machine Settings | Insufficient shot size, low injection pressure, inadequate injection speed | Increase shot size, gradually increase injection pressure, and increase injection speed. |
| Mold-Related Issues | Cold mold temperature, blocked gates or runners, uneven mold clamping | Adjust mold cooling settings, inspect and clean mold channels, ensure proper mold alignment. |
| Screw and Barrel Issues | Low barrel temperature, screw wear | Verify and adjust temperature zones; inspect and replace the screw if necessary. |
| Process Control | Low back pressure, short cycle time | Increase back pressure; adjust cycle time for sufficient filling. |
Short shots often result from insufficient plastic material, low injection pressure, or high melt viscosity. These issues can lead to incomplete filling and non-conforming products. Incomplete fills can also occur when the mold channels become blocked or the resin contains too much moisture.
Tip: Regular inspection of mold channels and careful monitoring of resin quality help prevent these defects during production.
Solutions and Process Adjustments
Manufacturers can reduce flash, short shots, and incomplete fills by adjusting several process parameters. They should focus on optimizing injection pressure and improving melt temperature. These changes help ensure complete filling of the mold cavity. The following steps support better production outcomes:
- Optimize injection pressure to ensure the resin fills every part of the mold.
- Improve melt temperature to lower viscosity and enhance flow.
- Enhance venting to allow trapped air to escape during filling.
- Modify gate sizes to promote even filling and reduce the risk of short shots.
Production teams should also adjust the material feed to increase the amount of plastic resin when needed. Gradually increasing injection pressure helps achieve proper filling without causing flash. Adjusting cycle time allows for sufficient filling and cooling, which reduces the risk of defects. These process adjustments support consistent quality in pet preform molding and help maintain efficient manufacturing.
Bubbles, Voids and Black Spots
Causes in Preform Mould Design
Bubbles, voids, and black spots often appear in preform molding. These defects can reduce clarity and weaken the structure of PET containers. Several factors contribute to their formation during manufacturing:
- Substantial moisture content in PET resin leads to vapor formation, causing brittleness and voids.
- Thick wall sections create pressure drops, resulting in voids in those areas.
- Unnecessary humidity and trapped air turn into vapor, forming bubbles inside the preform.
- Inappropriate venting traps air, which produces gas pockets and voids.
- High amounts of regrind cause overheating and burnt flakes, leading to black spots.
- Mold cracks trap water, creating visible spots in the finished product.
- Low temperature in the barrel prevents proper mixing, leaving unmelted grains that become defects.
Studies show that up to 6% of production batches may experience these issues, especially when moisture and contamination levels rise.
Bubbles and voids not only affect the appearance but also compromise the mechanical strength of PET preforms.
Solutions for Defect-Free PET Preforms
Manufacturers use several strategies to eliminate bubbles, voids, and black spots in PET preform molding. The following table summarizes common issues and recommended actions:
| Issue | Effect | Recommended Actions |
|---|---|---|
| Contamination (black specks, particles) | Structural weakness, reduced clarity | Stricter mold cleaning, install melt filters, improve material hygiene |
| Insufficient drying of PET pellets | Bubbles, voids, hazy appearance | Calibrate dryers, monitor drying time, use moisture sensors |
Manufacturers optimize drying processes to prevent bubbles and voids. They ensure proper material handling to avoid contamination. Regular equipment maintenance helps prevent defects. Maintaining an appropriate cushion of molten PET material ensures uniform wall thickness and minimizes haze or ovality. Automated moisture sensors and clear drying procedures support consistent quality. Visual inspection and regular mold cleaning reduce the risk of black spots.
Tip: Establishing strict cleaning protocols and monitoring moisture content can significantly lower defect rates in preform molding.
Crystallinity and Clarity Challenges
Causes of Haze and Brittleness
Crystallinity plays a major role in the clarity and mechanical properties of PET preforms. When manufacturers do not control crystallinity, haze and brittleness can develop. These defects reduce the visual appeal and can weaken the final product. Several factors contribute to these issues:
- Crystallinity control is essential because it affects both clarity and stress resistance in PET preforms.
- The total stretch ratio during preform molding determines the orientation of molecular chains, which impacts both transparency and mechanical strength.
- Overheating during the melt phase can cause haze, while improper mold temperature may increase brittleness.
- Cloudiness often results from moisture contamination in raw materials.
- Excessive injection speed can also lead to haze in the finished product.
Quality control teams often detect haze and brittleness by measuring the optical clarity and checking for visible cloudiness or cracks. Industry benchmarks require manufacturers to keep haze levels below 2% and ensure that preforms do not break under standard stress tests.
| Cause | Solution |
|---|---|
| Overheating during melt | Modify cooling period |
| Improper mould temperature | Lower the melt temperature |
Note: Controlling the cooling period and melt temperature helps reduce haze and brittleness in PET preforms.
Solutions for Optimal PET Preform Quality
Manufacturers use several strategies to optimize clarity and minimize crystallinity-related defects in PET preform molding. They focus on both material selection and process control:
- Choosing PET resin with high transparency and mechanical strength supports clarity in preforms.
- Drying the resin to reduce moisture content below 50 ppm prevents hydrolytic degradation, which can cause haze.
- Maintaining a melt temperature between 260°C and 290°C ensures uniformity and reduces the risk of defects.
- Using rapid cooling with a chilled water circuit locks in the amorphous structure, which is crucial for clarity.
| Factor | Description |
|---|---|
| Choice of PET Resin | PET is known for its high transparency and mechanical strength, essential for clarity in preforms. |
| Drying Process | Reduces moisture content below 50 ppm to prevent hydrolytic degradation, which affects clarity. |
| Processing Temperature | Melted at 260°C to 290°C; precise control ensures uniformity and minimizes defects. |
| Cooling Method | Rapid cooling using a chilled water circuit locks in the amorphous structure, crucial for clarity. |
Manufacturing teams who monitor these parameters achieve better clarity and mechanical performance in their preforms. Consistent process control and proper material handling help prevent haze and brittleness, ensuring high-quality results in preform molding.
Thread and Neck Finish Defects
Causes in Mold Design and Wear
Thread and neck finish defects often arise during PET preform molding. These issues impact bottle performance and can lead to leaks or poor sealing. Several factors contribute to these defects:
- Deformations and inconsistencies in neck dimensions frequently occur when molds misalign or core shifts happen during closure.
- Excessive injection pressure on the neck ring can distort the finish, making capping and sealing difficult.
- Improper vent groove design allows air compression, resulting in flash near the neck and shoulder.
- Blocked vents from dirt accumulation signal the need for regular maintenance.
- Uneven cooling around the neck finish causes warpage and instability in dimensions.
- Worn cores and cavities in the neck region produce poor surface finish and inaccuracies.
- Uneven temperature across plates shifts contact points, leading to defects.
- Plate warpage under production stress opens parting lines, causing flash.
Inconsistent neck finish dimensions create sealing difficulties and compromise product integrity. These defects stem from improper mold design, inaccurate machine settings, or cooling phase issues. Maintaining neck ring specifications within ±0.05 mm is critical to avoid rejects on the capping line.
Neck finish defects can disrupt manufacturing and reduce the reliability of ISBM bottles. Regular inspection and maintenance help prevent these issues.
Solutions for Consistent Neck Quality
Manufacturers use several engineering solutions and maintenance practices to achieve consistent neck quality in preform molding. The following table summarizes recommended practices:
| Practice Type | Description |
|---|---|
| Visual and Automated Inspection | High-resolution cameras and AI-based scanning systems identify surface defects. |
| Dimensional Accuracy Testing | Precision gauges or coordinate measuring machines verify critical neck dimensions. |
| Crystallinity Verification | DSC or FTIR spectroscopy confirms consistent crystallinity levels in the neck region. |
| Stress Testing | Thermal and mechanical tests reveal weak points in the preform structure. |
| Process Monitoring | Strict control over injection molding parameters ensures repeatability. |
| Controlled Environment | Clean, dry, temperature-stable storage prevents moisture absorption. |
| Avoid Extreme Temperatures | Prevent exposure to temperatures that can cause warping. |
| UV Protection | Keep preforms away from sunlight to prevent polymer degradation. |
| Pre-Use Inspection | Visually inspect preforms before blow molding for signs of damage. |
| Proper Capping | Calibrate capping machines to apply correct torque. |
| Leak & Pressure Testing | Routine burst and leak tests verify seal integrity. |
| Regular Equipment Calibration | Calibrate blow molders and conveyors for gentle handling. |
| Operator Training | Train staff on proper handling techniques. |
| Preventive Maintenance Schedule | Clean storage bins and inspect packaging regularly. |
Manufacturers inspect and replace worn neck rings, reinforce mold guide pins, and ensure uniform injection pressure around the neck ring. Regular cleaning of cooling channels and polishing surfaces reduce sticking and marking. These practices maintain mold integrity and support consistent quality in pet preform molding.
Consistent neck quality ensures reliable sealing and prevents leaks in ISBM bottles. Routine maintenance and precise engineering help achieve this goal.
Mold Wear & Mechanical Failures
Causes of Wear and Failure
Mold wear and mechanical failures present significant challenges in PET preform molding. These issues often arise from repeated cycles, improper maintenance, and harsh operating conditions. Manufacturing teams observe that high injection pressure, poor temperature control, and low-quality materials accelerate mold degradation. The average lifespan of mold components varies based on their function and maintenance. The following table shows typical lifespans and factors affecting durability:
| Component | Average Lifespan (Cycles) | Factors Affecting Lifespan |
|---|---|---|
| Cavity and Core Inserts | 1 million to 3 million | Material quality, injection pressure, temperature |
| Hot Runner System | 500,000 to 1 million | Component quality, clogging, leakage |
| Ejector Pins | 500,000 to 1.5 million | Design complexity, ejection force, lubrication |
| Valve Gates | 500,000 to 1 million | Operation frequency, maintenance quality |
Wear on cavity and core inserts leads to surface defects and dimensional inaccuracies. Hot runner systems may fail due to clogging or leakage. Ejector pins and valve gates experience wear from frequent movement and inadequate lubrication. These failures disrupt preform molding and increase production costs.
Preventive Measures and Maintenance
Manufacturers use strict maintenance schedules to maintain molds and prevent mechanical failures. Neglecting maintenance causes longer cycle times and foggy bottle surfaces. Poor maintenance reduces cooling efficiency and degrades mold cavity surfaces. This increases production costs and lowers product quality in pet preform molding.
Routine maintenance tasks help extend mold life and ensure reliable operation. The following table outlines essential tasks and their frequency:
| Maintenance Task | Frequency | Potential Risk if Neglected |
|---|---|---|
| Surface Cleaning | After each production run | Surface defects, contamination |
| Lubrication | Every 50,000–100,000 cycles | Increased wear, component seizure |
| Cooling Channel Flush | Quarterly or 200,000 cycles | Uneven cooling, longer cycle times |
| Full Mold Inspection | Every 250,000 cycles | Cracks, misalignment, part failure |
| Storage Protection | Before long-term storage | Corrosion, rust, pitting |
Manufacturing teams perform regular cleaning to prevent material buildup. Lubrication of moving parts avoids wear and misalignment. Routine inspections detect early signs of damage. Maintenance of cooling systems ensures efficient operation. Proper storage prevents rust and corrosion. These practices help maintain molds and support consistent quality in PET preform molding.
Regular maintenance protects molds and reduces mechanical failures in PET preform molding. Teams who follow strict schedules achieve higher product quality and lower production costs.
Cooling System Problems in Preform Molding
Causes of Uneven Cooling
Cooling plays a critical role in preform molding. Inconsistent cooling rates often lead to defects and production losses. Cooling can account for up to 70% of the total cycle time in pet preform molding. For example, a standard mold may require a 15-second cycle, while a premium mold with advanced cooling can reduce this to 12 seconds. This small difference can result in 400 fewer cycles per day, which means a loss of 19,200 preforms daily. Over time, this can cost millions in lost profits for manufacturing companies.
Uneven cooling can cause defects such as a “rocker bottom,” where the base of the pet bottle does not sit flat. This happens when the base remains too hot after molding and shrinks outward. Such defects affect both the appearance and function of the product. Processors may need to adjust cooling times or reduce heat, which impacts overall cycle time and efficiency.
The table below shows common issues and how to identify them during production:
| Common Issues | Identification Methods |
|---|---|
| High water temperature | Monitor chiller outlet temperature |
| Poor cooling flow or scale buildup | Regularly clean filters and check mold channels |
| Low water pressure or trapped air | Use thermal imaging tools to detect uneven heat zones |
Solutions for Uniform Cooling
Manufacturers can improve cooling performance by using several strategies. Simulation and analysis tools, such as CAE software, help optimize cooling channel layouts and predict temperature distribution. Regular maintenance ensures that cooling channels remain clean and free from blockages. Customizing the cooling system design for each mold, based on wall thickness and the number of cavities, also improves results.
- Simulation and analysis allow engineers to spot hot spots before production begins.
- Regular maintenance, including cleaning and checking the cooling medium, keeps the system efficient.
- Customization of the cooling system ensures that each mold receives the right amount of cooling for its unique design.
By following these steps, manufacturers can achieve uniform cooling and reduce defects in pet preform molding. Consistent cooling leads to better product quality and higher production rates.
Tip: Regularly check water temperature and pressure to prevent uneven cooling and maintain high-quality preform molding.
Preform Mould Design Flaws
Common Design Mistakes
Preform mould design errors often lead to defects in preform production. Many issues start with poor gate design, weak cooling, or undercuts in molds. These flaws can cause color inconsistencies, warping, surface defects, and melt fractures. The following table shows frequent design flaws, their descriptions, and their impact on preform production:
| Design Flaw | Description | Impact on Production Defects |
|---|---|---|
| Color Inconsistencies | Variations in shade from improper mixing or process control | Affects aesthetics and quality of final product |
| Warping | Deformation during cooling due to inadequate cooling time or temp. | Misshaped preforms, unusable for further processing |
| Surface Defects | Marks, scratches, or uneven texture from contaminated molds | Impacts aesthetics and quality of the final product |
| Inconsistent Neck Finish Dimensions | Variations in neck dimensions affecting bottle compatibility | Issues in sealing and functionality of bottles |
| Melt Fractures | Irregularities in material due to processing issues | Compromises structural integrity of the final product |
Ignoring simulation results or skipping prototype checks often leads to these problems. Many engineers make assumptions about mold design without verifying draft angles or cooling layouts. These mistakes increase the risk of warped or burned parts in preform molding.
Solutions and Engineering Best Practices
Engineers can reduce mold manufacturing errors by following best practices in mold design. They should always conduct prototype checks to identify flow or fit problems early. Simulation software helps spot potential defects before full-scale mold manufacturing begins. Small adjustments to gates, cooling, or wall thickness based on testing feedback improve outcomes in preform production.
Key engineering practices include:
- Use high-quality PET resin in the correct quantity to prevent defects.
- Dry material properly to eliminate moisture, which can cause voids.
- Maintain uniform wall thickness in preform mould design to avoid thin spots and distortions.
- Optimize neck finish design for proper sealing and compatibility with closures.
- Collaborate with experienced mold suppliers for practical adjustments.
- Engage in regular iteration and testing to refine mold design.
Collaboration with suppliers and careful verification of every mold design element support consistent quality in preform production. These steps help manufacturers avoid costly errors and ensure reliable pet preform molding.
Tip: Engineers who pay attention to simulation warnings and prototype results achieve better outcomes in mold manufacturing.
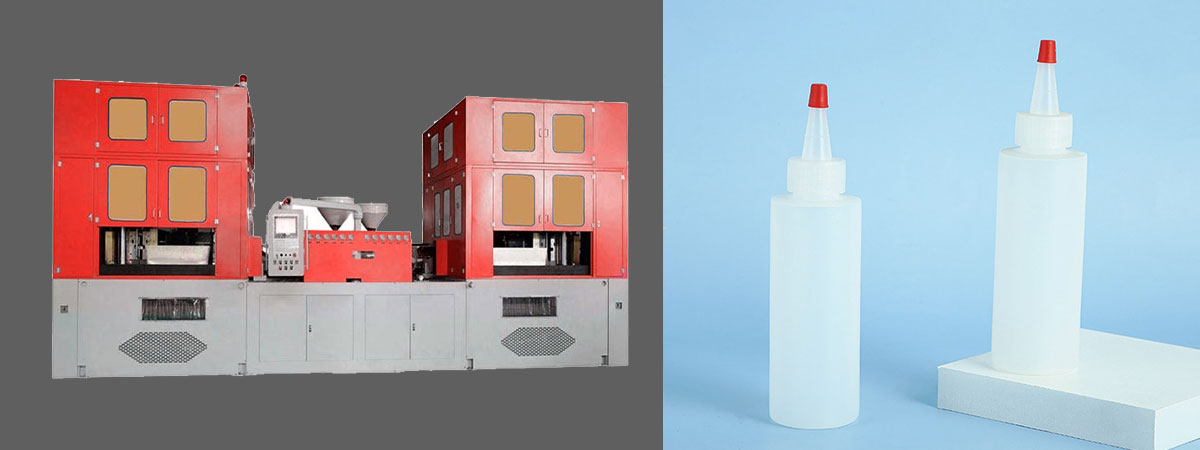
Machine Selection for PET Preform Molding Machines
Choosing the Right ISBM Machine
Selecting the right ISBM machine is essential for efficient production with PET preform molding machines. Manufacturers must consider several criteria to match their production needs and maintain high-quality output. The following list outlines the most important factors:
- Material compatibility: The ISBM machine must process the specific thermoplastics required, such as pet.
- Production capacity requirements: The machine’s output should align with the expected production volume to prevent inefficiencies.
- Single-stage vs. two-stage systems: Manufacturers should choose based on the need for flexibility and production speed.
- Cavitation (mold cavity count): The number of cavities should reflect production goals and quality control needs.
- Automation level: Higher automation can reduce labor costs and increase production speed.
Machine specifications play a crucial role in production efficiency. Clamping force ensures proper mold closure, which reduces defects. Injection speed affects cycle times and output. Precise control over heating zones maintains material integrity, directly impacting product quality. Blow pressure must also match the requirements of pet preform molding machines to ensure consistent results.
Tip: Matching machine specifications to production needs helps manufacturers avoid bottlenecks and maintain consistent quality.
Key Factors for Machine Compatibility
Compatibility between PET preform molding machines and mold design ensures smooth operation and high-quality products. The table below highlights the main factors to consider:
| Factor | Description |
|---|---|
| Material Compatibility | ISBM machines must handle the chosen thermoplastic, such as pet, to prevent quality issues and equipment damage. |
| Production Capacity | The required output determines the size and type of pet preform molding machines. High-volume manufacturing needs industrial machines, while smaller runs use compact models. |
| Cavitation (Mold Cavity) | The number of bottles produced per cycle affects both output and complexity. Higher cavitation increases production but may require more advanced pet preform molding machines for quality control. |
Manufacturers should always verify that their preform molding and mold design match the capabilities of their ISBM machine. This approach prevents downtime and ensures that pet preform molding machines deliver reliable, efficient performance.
Preventive Maintenance in Preform Molding
Routine Maintenance Strategies
Routine maintenance forms the backbone of efficiency in PET preform molding. Teams who follow regular maintenance schedules see fewer defects and longer machine uptime. Daily cleaning removes resin buildup from cavities and runners. Operators use special cleaning agents and soft cloths to protect mold surfaces. Compressed air clears the runner system, which prevents blockages and keeps production smooth.
Lubrication of moving parts at least twice per shift reduces friction and wear. Maintenance staff check for deformation and replace worn components quickly. Applying anti-rust oil protects molds during long stops. Storing molds in a dry, cool place prevents corrosion. Teams conduct daily and quarterly inspections, recording all findings to track mold health. Operators avoid excessive clamping force and follow proper shutdown steps to prevent mold damage.
The table below highlights how each maintenance routine impacts defect rates and operational efficiency:
| Maintenance Routine | Impact on Defect Rates and Uptime |
|---|---|
| Regular Lubrication | Reduces friction, prevents wear, ensures smooth operation. |
| Daily Cleaning | Improves efficiency, reduces defects caused by material buildup. |
| Inspection for Wear and Tear | Prevents cascading failures and unplanned downtime. |
| Software and Control System Updates | Enhances performance and compatibility, reducing operational issues. |
| Electrical System Checkups | Detects early electrical issues, preventing incorrect blow timing. |
| Operator Training | Ensures efficient operation and reduces equipment damage. |
Troubleshooting Common Issues
Quick troubleshooting keeps preform molding lines running at peak efficiency. Teams address surface defects by ensuring uniform cooling and drying the pet resin. They solve yellowing by optimizing barrel temperature settings. Regular mold inspections catch dimensional inaccuracies before they affect production.
The following table lists common problems and their solutions:
| Problem | Solution |
|---|---|
| Surface Defects | Ensure uniform cooling and dry the PET resin. |
| Yellowing of Preforms | Optimize barrel temperature settings. |
| Dimensional Inaccuracies | Regularly inspect and maintain molds. |
| Inconsistent Wall Thickness | Maintain consistent wall thickness and avoid abrupt transitions. |
| Poor Material Selection | Choose appropriate materials based on properties and compatibility. |
| Mould Maintenance | Regularly clean and maintain the mould to prevent issues. |
Operators also invest in machines with precise heating and cooling controls to prevent uneven preform thickness. Advanced cooling systems and automatic defect detection help reduce downtime. Reliable machines with easy maintenance features improve operational efficiency and product quality.
By following these strategies, manufacturing teams minimize reject rates and maximize efficiency in pet preform molding.
Conclusion

Manufacturers face many challenges in preform mould design. They address surface defects, dimensional errors, and cooling issues with engineering solutions. Teams improve results by choosing the right machines and following strict maintenance schedules.
- Quality control ensures reliable production.
- Continuous improvement reduces defects and waste.
Applying best practices in PET preform molding leads to efficient and consistent manufacturing.
FAQ
What Causes Flash in PET Preform Molding?
Flash often results from excessive injection pressure or poor mold alignment. Engineers check mold clamping and adjust pressure settings. They also inspect for worn mold parts. Regular maintenance reduces flash and improves product quality.
How Can Manufacturers Prevent Bubbles in Preforms?
Manufacturers dry PET resin thoroughly before molding. They monitor moisture levels using sensors. Proper drying prevents vapor formation. Clean molds and controlled injection speed also help reduce bubbles.
Why Is Wall Thickness Important in Preform Design?
Wall thickness affects the strength and stretchability of preforms. Uniform thickness ensures even expansion during blow molding. Thin spots can cause weak areas. Engineers use automated mapping to check thickness.
What Is the Role of Cooling Channels in Mold Design?
Cooling channels remove heat quickly from the mold. Proper channel design ensures even cooling. This prevents warping and reduces cycle time. Engineers use simulation tools to optimize cooling layouts.
How Often Should Teams Perform Mold Maintenance?
Teams clean and inspect molds after each production run. Lubrication and full inspections occur every 50,000 to 250,000 cycles. Regular maintenance extends mold life and keeps production efficient.